It's Halloween time and everybody, including your action figures, wants to be a pirate! Arrr matey! If only pirate stuff were easily and cheaply available for any figure!
My collection of toy skeletons spend a lot of time wishing they were in Disneyland (like I do), so while I was making my
Pirate Bar dollhouse, I also needed to come up with some pirate hats. An online discussion mentioned Assassin's Creed figures and accessories, and of course, there's the authorized "Pirates of the Caribbean" action figures based on the movies, but I am a cheapskate at heart, unwilling to buy figures just for the sake of stripping off their accessories, plus I have customizing skills aplenty. I wanted to try making my own pirate hats.
I tried cloth and leather, with disappointing results, so I tried Sculpey polymer clay. It was shockingly quick and easy and I really liked the results, so Sculpey was definitely a winner!
 |
| Proof of concept- making pirate hats |
PIRATE HAT SCULPEY TUTORIAL
Step 1: Buy a package of Sculpey. You can also buy a multi-color pack at Michaels and download their 40% off coupon. Put a sheet of wax paper on your work area, and cut off a slice or two of Sculpey.
 |
| Step 1: Buy Sculpey. Slice. |
Step 2: Roll the Sculpey slices into a ball, making sure that all of the bits and pieces mold together. Flatten the ball into a pancake. Use a rolling pin or a nearby can of WD-40 and roll the pancake to 1mm in thickness. 1/16" is acceptable for larger action figure heads.
 |
| Step 2: Roll into a ball and flatten it |
Step 3: Making a hat form speeds up production considerably. This is a wooden bead that happens to be the right size, mounted on a bamboo stick.
 |
| Step 3: Make a hat form |
Step 4: Put the flat, round Sculpey on the hat form. Press down slightly, and the hat crown will gradually form.
 |
| Step 4: Put Sculpey on form |
Step 5: Refine the hat shape with additional pinching. Straighten out and trim the brim.
 |
| Step 5: Refine the hat shape |
Step 6: Fold up 3 sides of the brim. It's surprisingly easy to make that perfect colonial-era tricorn hat!
 |
| Step 6: Fold up the brim |
Step 7: Gently remove the hat from the hat form, and put it on a piece of foil. Place in the oven at low heat (about 200 degrees) for about 5 minutes. Babysit it so it doesn't burn.
 |
| Step 7: Bake! |
Step 8: When it's fresh out of the oven, the hat will be hot! Put it on your action figure, and it will mold itself to the figure's head shape as it cools. Try not to burn your fingers doing this step. If the hat cracks, just make another one. Once the hat cools, you might want to paint on some matte acrylic clearcoat to provide a barrier, in case you're worried about a chemical reaction between the Sculpey and your action figure.
 |
| Step 8: Mold to exact figure's head |
Step 9: Make a lot more! It takes about 5 or 10 minutes to make each hat. This method is really inexpensive, and you can custom make each hat for a specific head, without waiting for toy companies to manufacture them.
 |
| Disneyland, here we come! Arrrr! |
PIRATE CUTLASS TUTORIAL
For a minimal investment, or just digging around in the tools and parts drawer, it's quick and easy to manufacture your own Pirate Cutlasses.
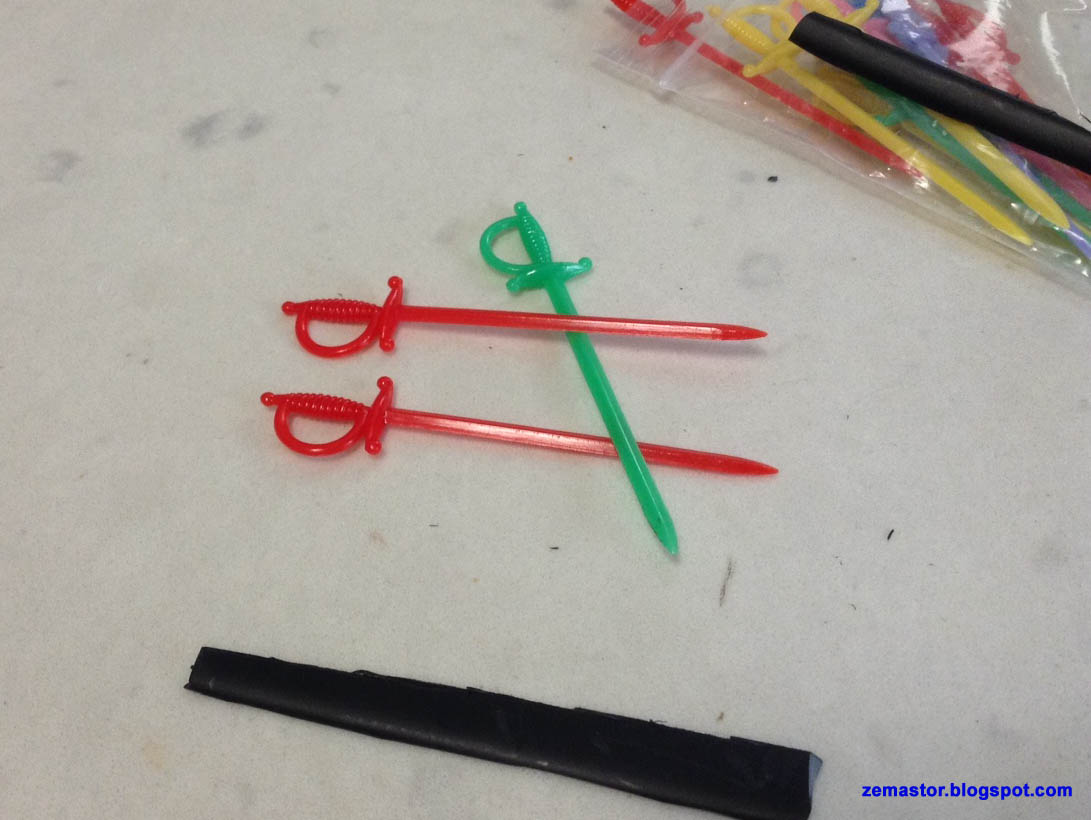
Step 1: Buy a package of plastic sword cocktail picks. You can get them at any party supply store, or even the dollar store. Then locate a cheap or free source of ABS plastic. I used an old Macbook tray. The plastic should be thin enough to trim with heavy duty kitchen shears.
 |
| Step 1: Buy sword shaped cocktail picks and find some ABS |
Step 2: Use a pair of wire cutters to cut off the plastic sword blade. Then cut your piece of ABS to the shape of a cutlass blade. Use sandpaper to finish the edges. If you need a thicker blade, cut out 2 identical cutlass pieces from the sheet, and glue them together. Carve a peg at the bottom of the cutlass blade.
 |
| Step 2: cut off sword blade and shape replacement cutlass blade |
Step 3: Use a power drill and drill a small hole in the party pick's sword hilt.
 |
| Step 3: Drill hole in hilt |
Step 4: Use 5 minute epoxy to glue the new blade into the sword hilt. The peg-in-hole will give you a much stronger joint than simply gluing the 2 pieces together without any reinforcement.
 |
| Step 4: Glue new blade into hilt |
Step 5: Paint the cutlass with your favorite primer. This step is optional.
 |
| Step 5: Paint with primer |
Step 6: Paint the cutlass with its final color and allow it to dry. The use a matte clearcoat.
 |
| Step 6: Paint with final colors and clearcoat |
RELATED PAGES:
"Captain Bar" DIY Dollhouse becomes Pirate Bar
Miniature DIY Pirate Gachapon Machine
Polymer clay miniature coins for dioramas
Greek Mythology Vitruvian H.A.C.K.S. action figures
The Search for Dokuroman
October Toys Skeleton Warriors
A Collection of Toy Skeletons


No comments:
Post a Comment